
Introducing
Every IT administrator deals with automation. In Microsoft 365, Azure AD environment, the choice often falls on scripts written in PowerShell. These are usually run on some company server (less often in Azure Automation) and unfortunately quite often the credentials are stored in the scripts. Sometimes even to accounts with very high permissions. Not infrequently I see customers have their script contain global admin credentials.
The optimal solution is to use Azure Automation Account together with Azure Key Vault.
For those who still want to run PowerShell scripts on their on-prem server, certificate authentication is the solution. Let’s show you how to do it.
First of all, we must have a certificate. For this purpose, a self sign certificate is sufficient. The following block of commands will create the certificate in local machine cert store, export (backup) certificate to a PFX file, delete certificate from the system and re-import certificate as non-exportable.
$Cert = New-SelfSignedCertificate -Type Custom -Subject "CN=Script account" -TextExtension @("2.5.29.37={text}1.3.6.1.5.5.7.3.2,1.3.6.1.5.5.7.3.1") -CertStoreLocation "Cert:\LocalMachine\My\" -HashAlgorithm sha256 -KeySpec Signature
$CertPassword = ConvertTo-SecureString -String "MyPassword" -Force -AsPlainText
$thumbprint = $Cert.Thumbprint
$Cert | Export-PfxCertificate -FilePath .\cert.pfx -Password $CertPassword
Get-ChildItem -Path .\cert.pfx | Import-PfxCertificate -CertStoreLocation "Cert:\LocalMachine\My\" -Password $CertPassword
$Cert | Export-Certificate -FilePath cert.cer
Save the cert.pfx file somewhere safe and delete it from the server. We will need the cert.cer file when we register the application in Entra ID.
In order to start using in with this certificate, we need to configure an Entra ID registered application. I’ll demonstrate accessing to the Graph API, Exchange, and Azure Active Directory one at a time.
Microsoft Graph API
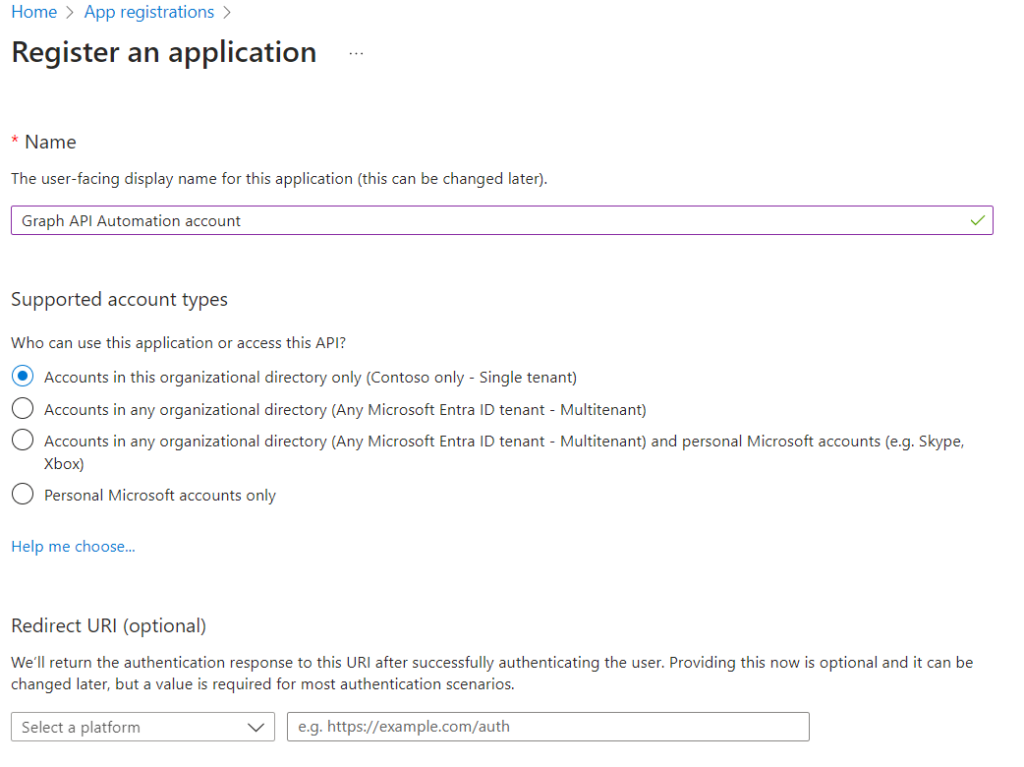
Go to App registrations and create a new app.
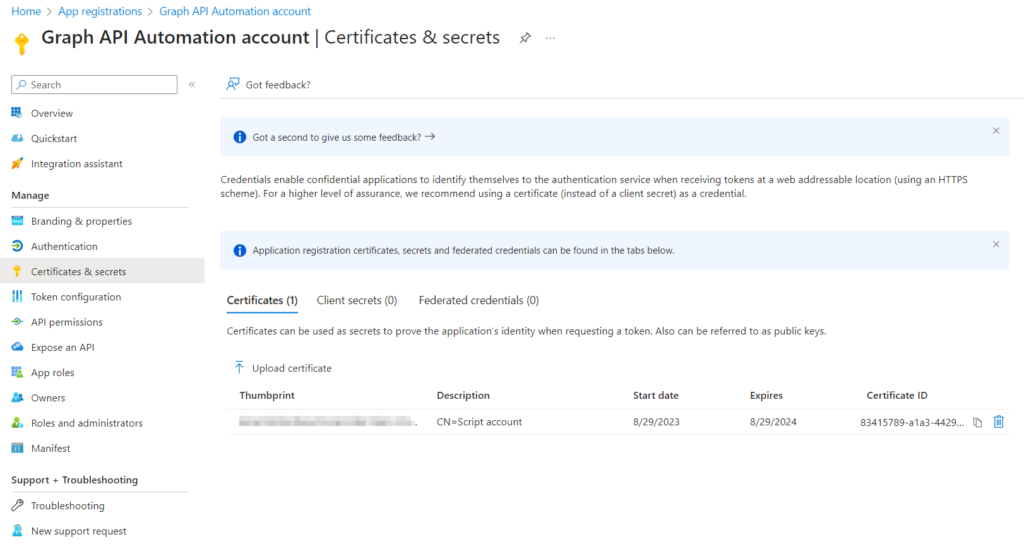
In the app, go to “Certificates & secrets” and upload the certificate (cert.cer).
Now we just need to add the necessary API permissions to the Graph API. The Graph API has two types of permissions, delegated and application. When we use certificate for authentication, we need to use application permissions. For example, User.Read.All. After adding the rights, don’t forget to give the administrator’s consent.
And now just a simple script to list users via the Graph API. Client ID and Tenant ID you find in the Overview of the registered application.
$ClientId = "00000000-0000-0000-0000-000000000000"
$TenantId = "00000000-0000-0000-0000-000000000000"
$CertThumbprint = "<Certificate thumbprint>"

Import-Module -Name Microsoft.Graph.Authentication -ErrorAction Stop
Connect-MgGraph -ClientId $ClientId -TenantId $TenantId -CertificateThumbprint $CertThumbprint -NoWelcome
$Users = Get-MgUser -All
$Users | Format-Table -AutoSize
Exchange Online
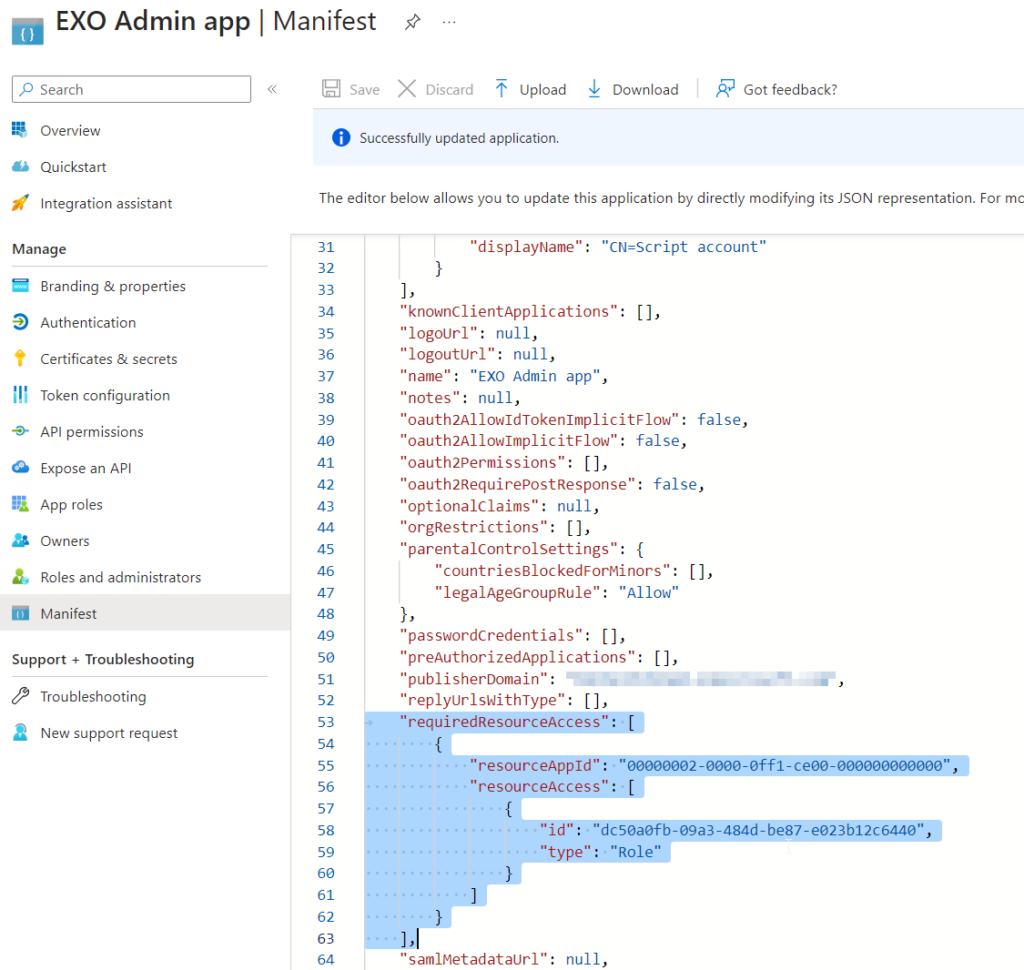
Exchange Online has a similar process. We also create an application and upload the certificate. In addition, we need to modify the application manifest. In the manifest, look for:
"requiredResourceAccess": [
  {
    "resourceAppId": "00000003-0000-0000-c000-000000000000",
    "resourceAccess": [
      {
        "id": "e1fe6dd8-ba31-4d61-89e7-88639da4683d",
        "type": "Scope"
      }
    ]
  }
],
And replace it with:
"requiredResourceAccess": [
  {
    "resourceAppId": "00000002-0000-0ff1-ce00-000000000000",
    "resourceAccess": [
      {
        "id": "dc50a0fb-09a3-484d-be87-e023b12c6440",
        "type": "Role"
      }
    ]
  }
],
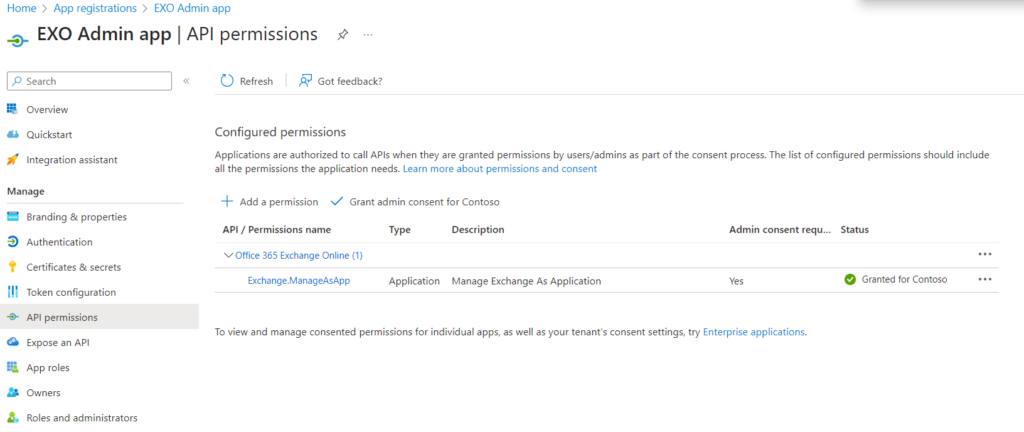
Once we save the manifest, the Exchange.ManageAsApp permission will appear in the API permissions section. Don’t forget to grant admin consent.
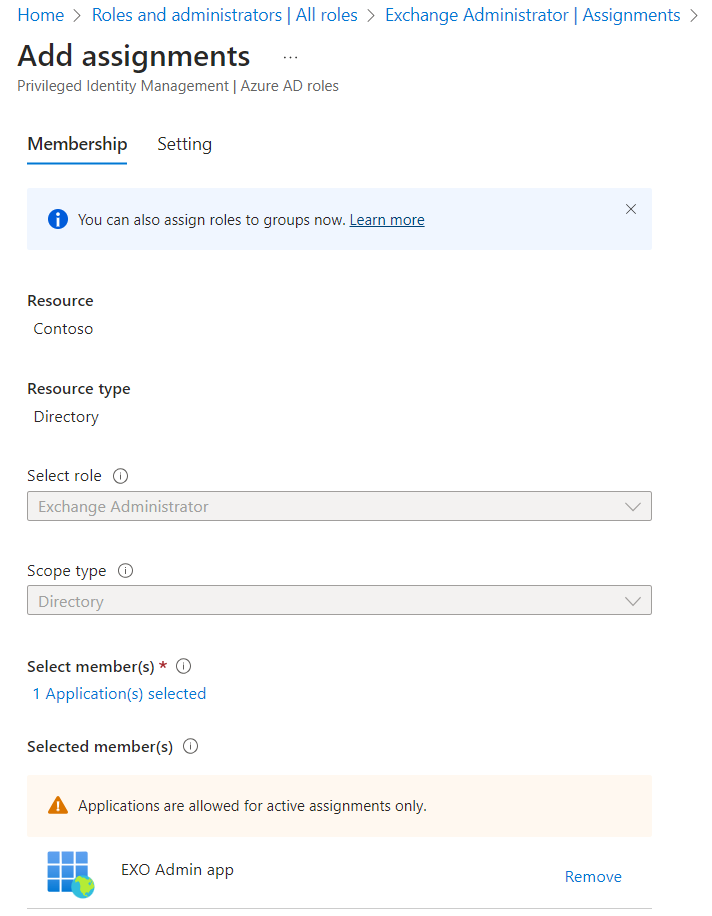
Now we need to add the Exchange Administrator role to this application (service principal). Go to Roles and administrators in Entra ID and find the Exchange Administrator role and add the newly created application (service principal).
The login procedure in the script will be as follows:
$ClientId = "00000000-0000-0000-0000-000000000000"
$TenantName = "<tenant name>.onmicrosoft.com"
$CertThumbprint = "<Certificate thumbprint>"
$Certificate = Get-Item "Cert:\LocalMachine\My\$($CertThumbprint)"

Import-Module -Name ExchangeOnlineManagement
Connect-ExchangeOnline -AppId $ClientId -Organization $TenantName -Certificate $Certificate -ShowBanner:$false
Get-EXOMailbox -ResultSize 5 | Format-Table -AutoSize
Entra ID (Azure AD)
It’s even easier for Entra ID. All we need to do is register the app as in the previous two cases. We don’t need to edit the manifest or assign rights in API permissions. Just assign the appropriate rights for the application (service principal). In the Entra ID in “Roles & admins” section, find the appropriate role and assign rights. For example, Global reader.
Then we can use the PowerShell:
$ClientId = "00000000-0000-0000-0000-000000000000"
$TenantId = "00000000-0000-0000-0000-000000000000"
$CertThumbprint = "<Certificate thumbprint>"
Import-Module -Name AzureAD
Connect-AzureAD -TenantID $TenantId -ApplicationId $ClientId -CertificateThumbprint $Thumbprint
Get-AzureADUser
Conclusions
It’s simple and more secure than leaving your username and password stored in a script somewhere where anyone can find it. 😜