If you plan to manage your computers exclusively in Intune and/or plan to store BitLocker keys in Azure AD, you’ve wondered what happens to the BitLocker key when you remove the computer account from Azure AD.
It’s simple. The BitLocker key will be removed along with the computer account. See How to manage stale devices in Azure AD Microsoft Learn.
So how do we avoid the situation where we remove the computer account from Azure AD and then find that we need to get to the data on the computer? Certificate-based BitLocker Data Recovery Agent (DRA) will help. The following describes how to implement BitLocker Certificate DRA using Microsoft Intune.
Prepare certificate
You can choose between a self-signed certificate and a certificate signed by a certificate authority.
You can create a self-signed certificate simply by using PowerShell:
$Cert = New-SelfSignedCertificate -Type Custom -Subject "CN=Bitlocker DRA" -TextExtension @("2.5.29.37={text}2.23.133.8.3,1.3.6.1.4.1.311.21.6,1.3.6.1.4.1.311.67.1.1,1.3.6.1.4.1.311.67.1.2") -CertStoreLocation "Cert:\CurrentUser\My\" -HashAlgorithm sha512 -KeySpec KeyExchange
$CertPassword = ConvertTo-SecureString -String "MyPassword" -Force -AsPlainText
$thumbprint = $Cert.Thumbprint
$Cert | Export-PfxCertificate -FilePath .\cert.pfx -Password $CertPassword
Get-ChildItem -Path .\cert.pfx | Import-PfxCertificate -CertStoreLocation "Cert:\CurrentUser\My\" -Password $CertPassword
$Cert | Export-Certificate -FilePath cert.cer
Create certificate template
To create a CA-signed certificate, you need a CA. However, this article does not describe the implementation of ADCS as there are many articles on the Internet that describe this.
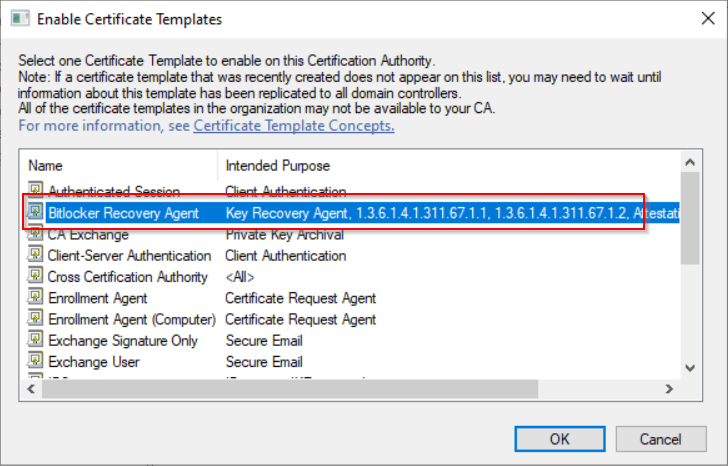
1) Duplicate template “Key Recovery Agent”

2) Specify the template display name (alternatively template name) and validity period
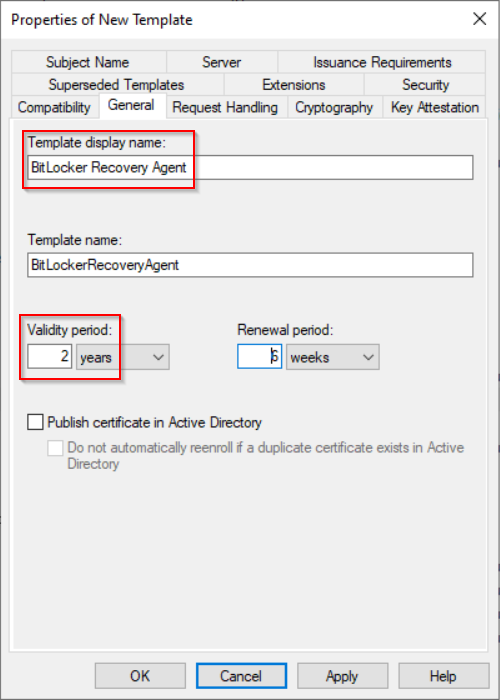
💡Tip: Certificate expiration is not that important because you can decrypt volumes even with an expired certificate.
3) Edit Application Policies
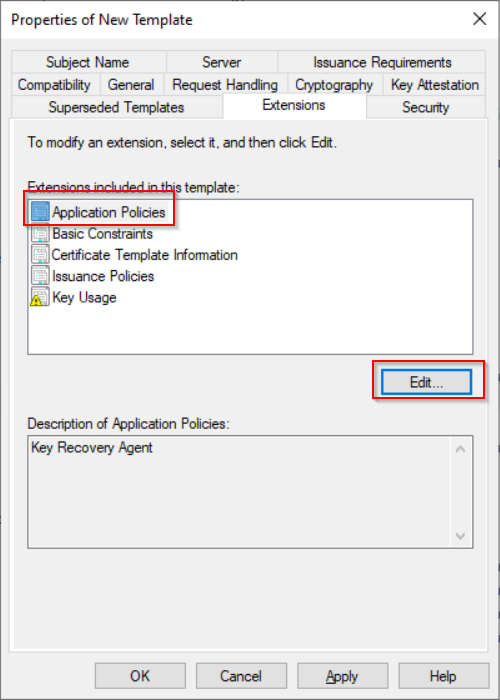
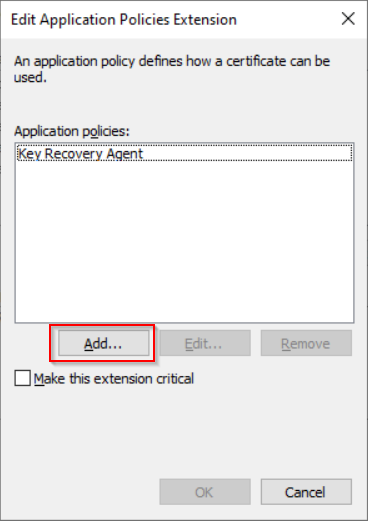
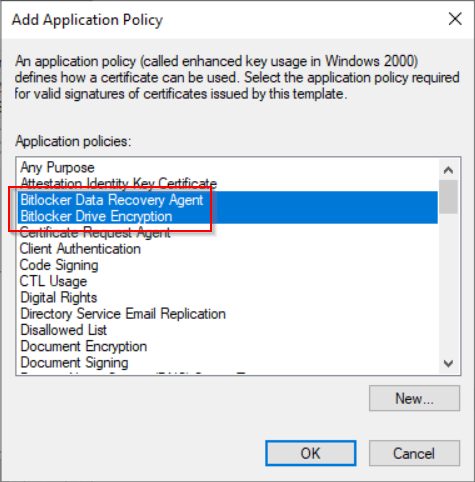
📑Note: If you don’t see “BitLocker Data Recovery Agent” and “Bitlocker Drive Encryption” you can add them using the “New” button.
- Bitlocker Drive Encryption: 1.3.6.1.4.1.311.67.1.1
- Bitlocker Data Recovery Agent: 1.3.6.1.4.1.311.67.1.2
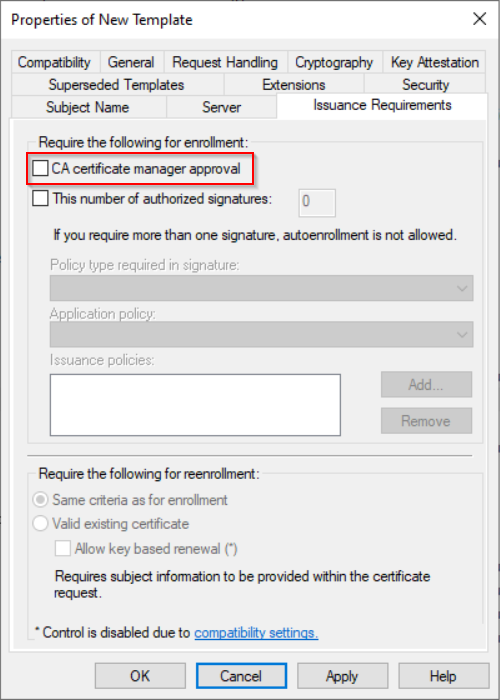
4) Edit Issuance Requirements
Deselect “CA certificate manager approwal”.
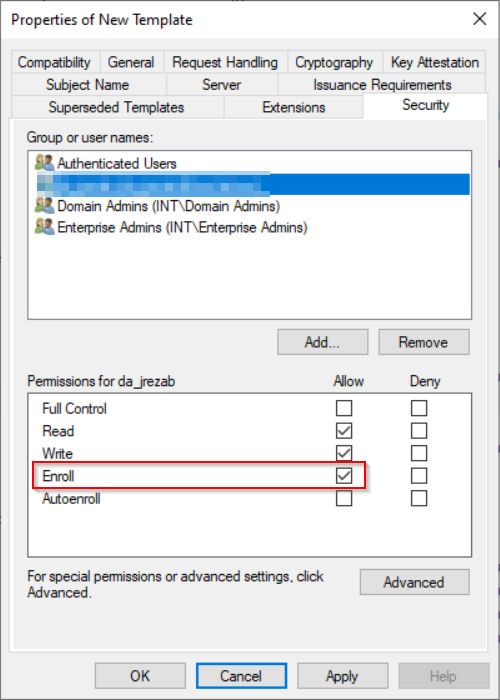
5) Add permission to issue certificate
📑Note: By default groups “Domain Admins” and “Enterprise Admins” have permission to issue certificate by this template. But if you want to add another user, the add the user and allow Enroll for them.
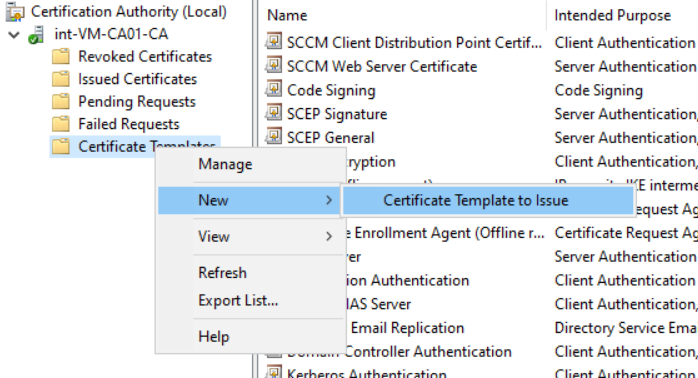
6) Publish the new certificate template
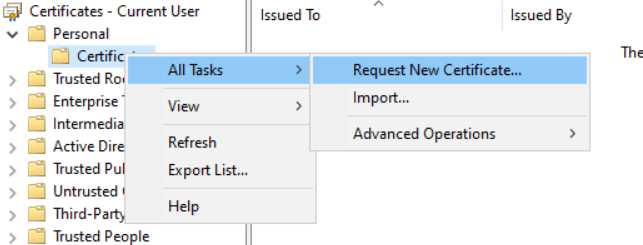
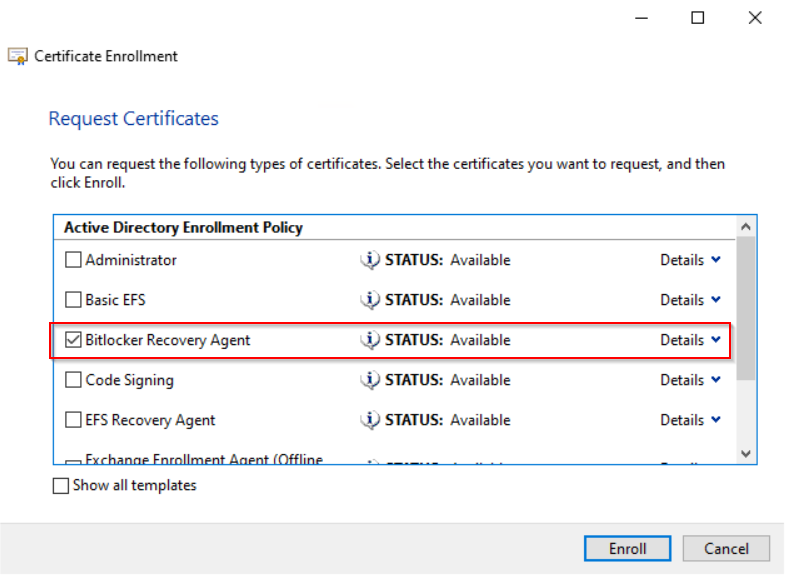
7) Request new certificate
New we prepared certificate teplate and we can request new certificate.
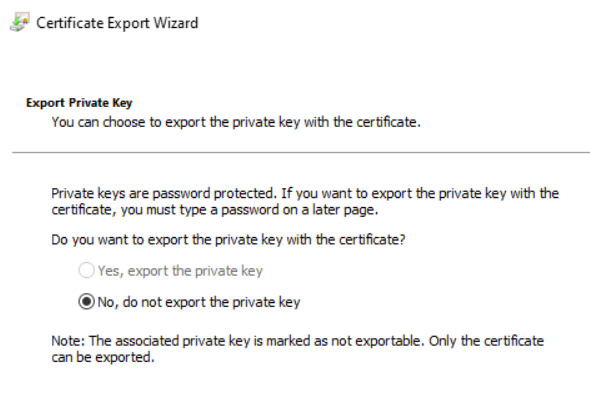
8) Export the certificate
⚠️Warning: This certificate is very sensitive as it will allow you to unlock/decrypt all Bitlocker volumes in your organization. Therefore, you should keep it on a secure device (perhaps some kind of hardware token).
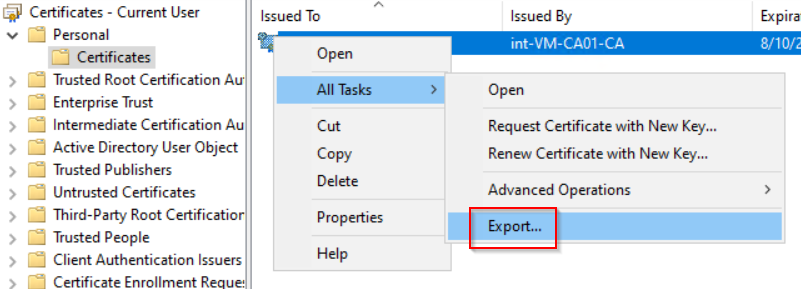

Exported certificate will be used in next chapter.
Prepare PowerShell script for import certificate to computers
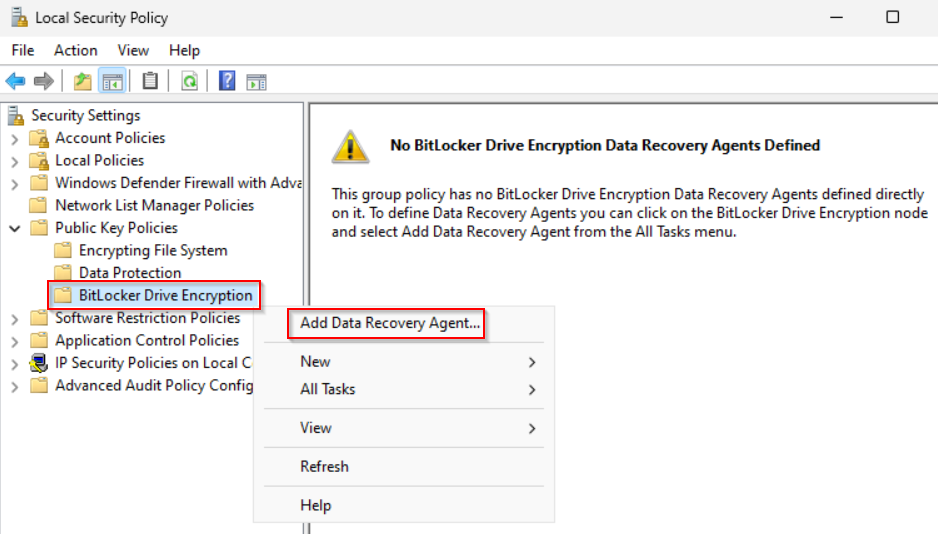
Normaly, when the computer is part of on-premise Active Directory, you use GPO for distributing the certificate. But when the computer is Azure AD Joined and is managed by Intune, then you have to import certificate directly to registry by a PowerShell script.
HKLM:\SOFTWARE\Policies\Microsoft\SystemCertificates\FVE\Certificates\<Certificate Thumbprint>On test computer open Local Security Policy and import the certificate to the Bitlocker Drive Encryption.
Local security policy stores the certificate in the registry. The created registry key needs to be exported to an xml file. This file is then used for importing on other computers.
$Blob = Get-ItemProperty -Path "HKLM:\SOFTWARE\Policies\Microsoft\SystemCertificates\FVE\Certificates\<Certificate thumbprint>" -Name "Blob"
$Blob.Blob | Export-Clixml -Path .\cert.xml
Here is example of simple script. Save it as “ImportCert.ps1″ and change the $certThumprint” variable.
$certThumbprint = "<Certificate thumbprint>"
$certValue = Import-Clixml -Path .\cert.xml

$RegKey = "HKLM:\SOFTWARE\Policies\Microsoft\SystemCertificates\FVE\Certificates\" + $certThumbprint
if (!(Test-Path $RegKey)) {
    New-Item -Path $RegKey -Force
}

New-ItemProperty -Path $RegKey -Name "Blob" -PropertyType Binary -Value $certValue -Force
Prepare Intune Configuration profiles
Win32 app with script
By Microsoft Win32 Content Prep Tool you can prepare script package. Save script and xml file to a folder and run:
.\IntuneWinAppUtil.exe -c .\Script -s ImportCert.ps1 -o .\Output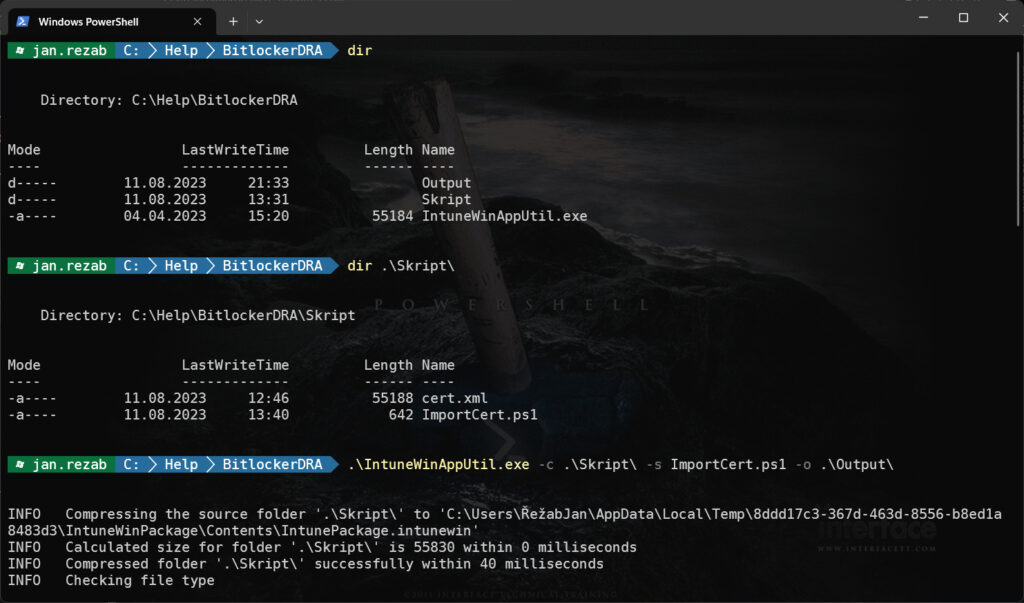
Now, you can create new Win32App in Intune.
Install command:
%windir%\SysNative\WindowsPowershell\v1.0\PowerShell.exe -ExecutionPolicy Bypass -File ImportCert.ps1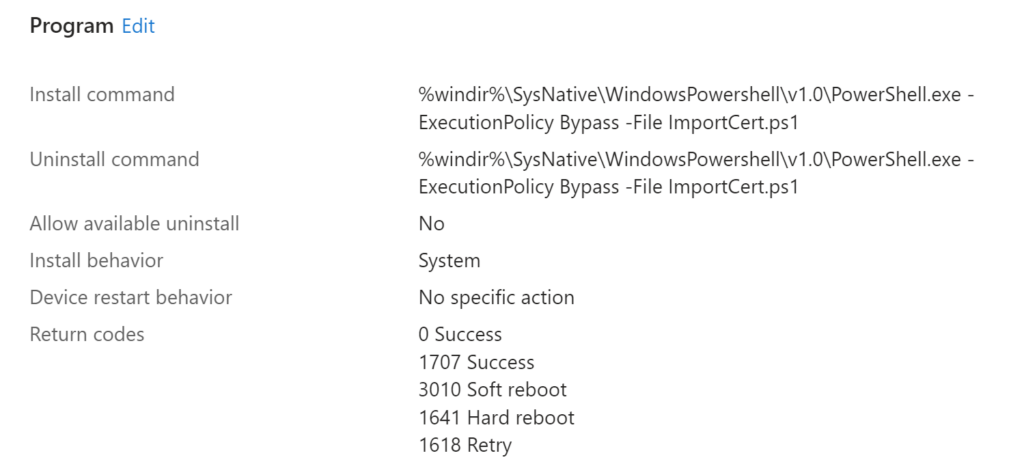
Detection rule:
HKEY_LOCAL_MACHINE\SOFTWARE\Policies\Microsoft\SystemCertificates\FVE\Certificates\<Certificate thumbprint>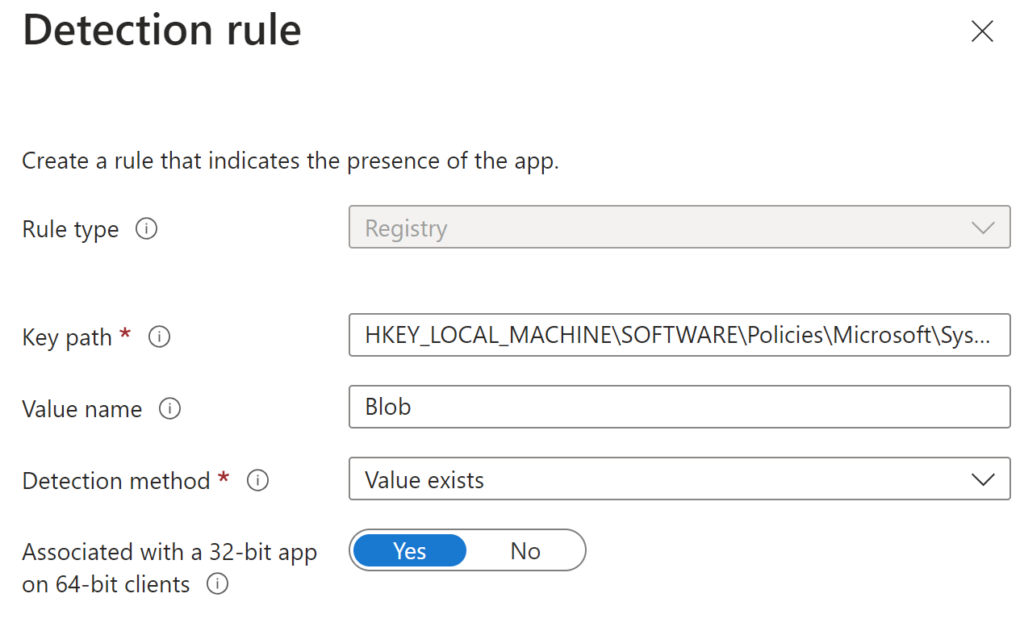
Deploy created app to computers.
BitLocker configuration profiles
You have to deploy two BitLocker configuration profiles. One which setup BitLocker and second which setup BitLocker identifier. The first one can looks like this:
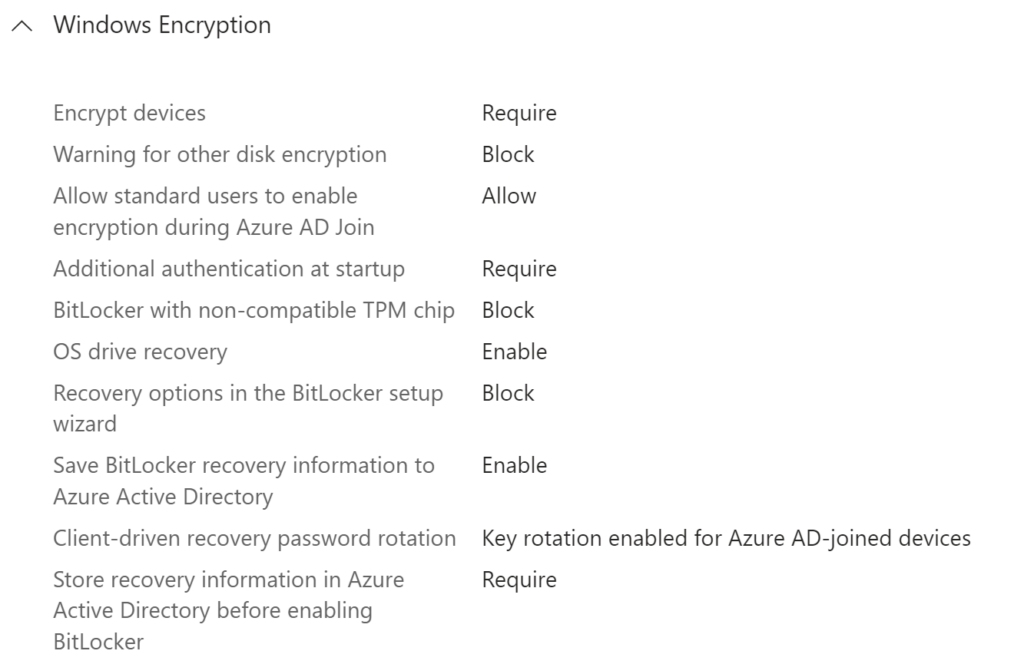
⚠️Warning: The “Certificate-based data recovery agent” parameter has to be set to “Not configured”.
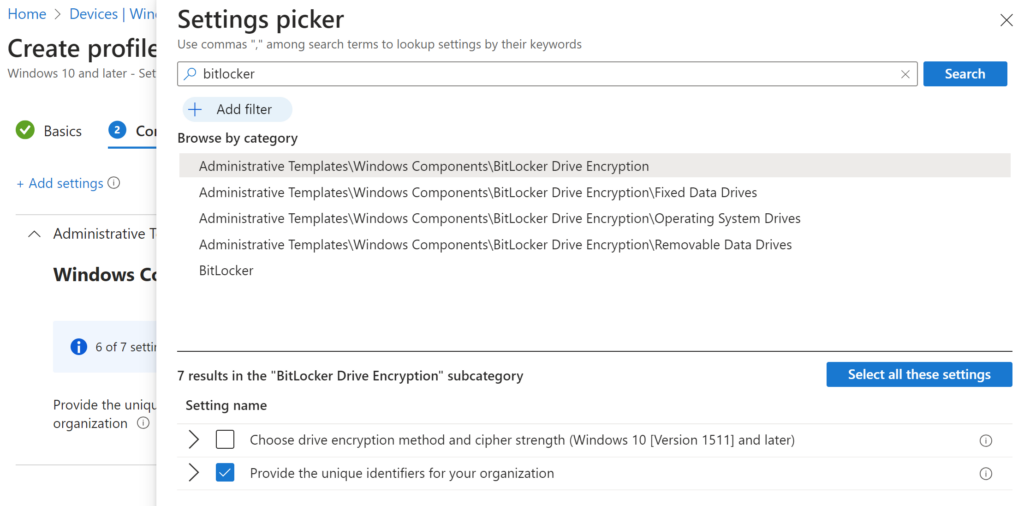
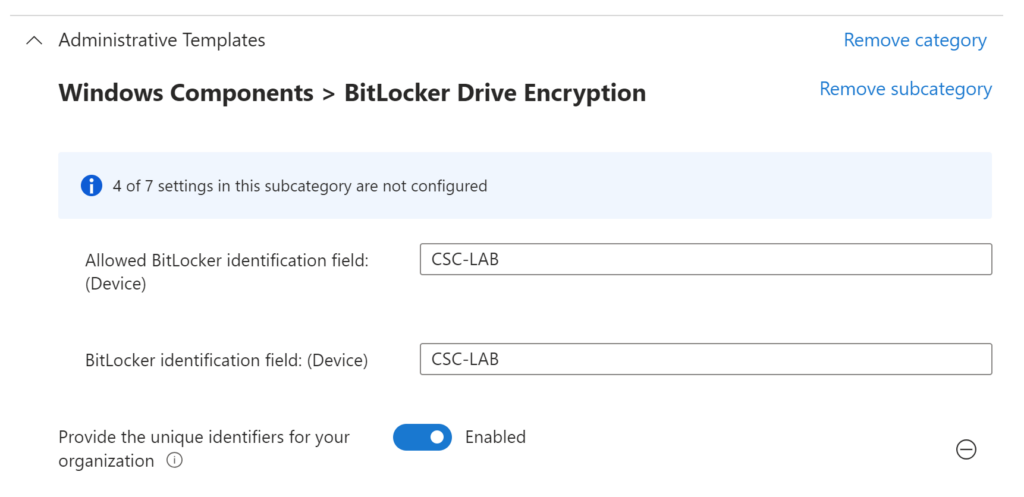
BitLocker identifier can be setup by “Settings catalog” policy and it is a string. For example name of your company.
If everything works as expected, you can restart computer and check the BitLocker settings on the test computer.
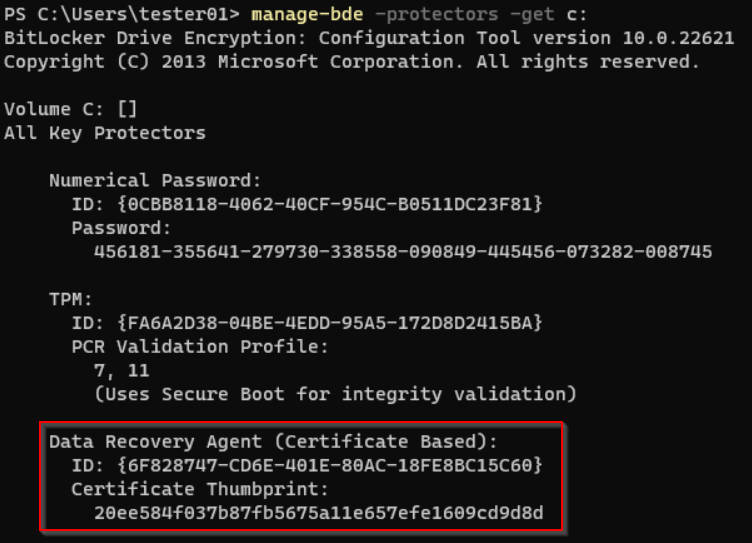
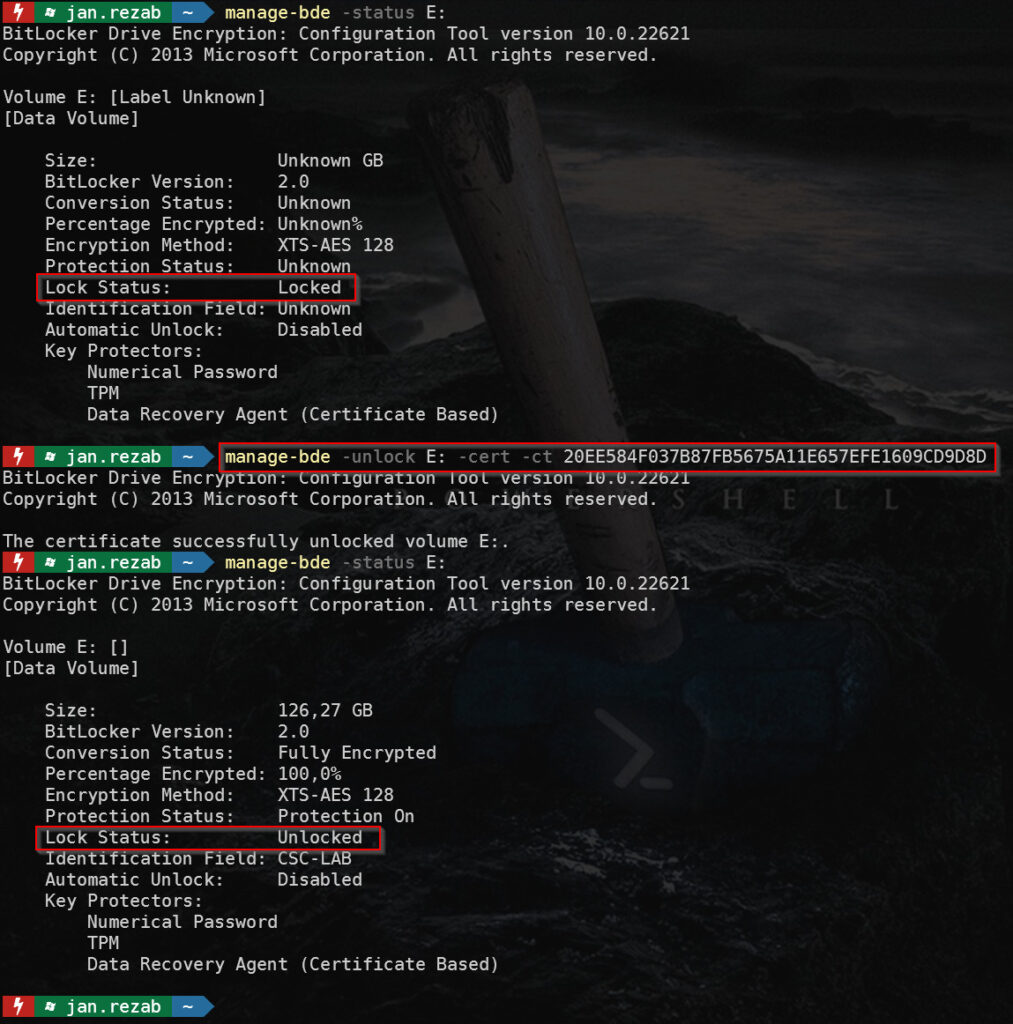
And when you connect the disks to the computer where is the certificate with private key, you can unlock volume by
manage-bde.exe -unlock <Driver letter> -cert -ct <certificate thumbprint>